Deploying FastAPI Python App With Kamal: Self-Hosted CI/CD & DevOps for €5/mo
![deploying-python-fastapi-with-kamal.webp] A simple Hello World-like FastAPI application deployed to a Hetzner host. We’ll use Kamal, Docker, Github Actions and Cloudflare.
Scenario
Let’s imagine we have a product called Crabcoin. It’s written in Python using FastAPI Framework. We will need to deliver it to our customers with minimal DevOps skills.
In order to follow this scenario it’s not required to be an expert. Basic Linux, Docker and Git skills would be enough.
Scenario deliverables
- App is available on
app.crabcoin.ccdomain. - App hosted on inexpensive Hetzner VM (~€3-5)
- DNS and TLS configured via Cloudflare.
- FastAPI App is Dockerized, deployed via Kamal and stored on GitHub.
- Application automatically deployed on a push to
mainbranch.
Document Structure
This document is loosely broken down into two sections: Dev & Ops.
We will spend some time on best-practices on how to Dockerize Python application, but the most focus would be on the Ops part where we would discuss how to deploy it.
Dev
Dev part will be bare-minimum, just enough to get to the Ops part.
Git Repository
This is going to be a new git repo. Initialize it like this:
❯ mkdir -p crabcoin-web
❯ cd crabcoin-web
❯ mkdir app
❯ git init .
In one of the next steps we’ll be pushing this repo to GitHub, but for now let’s move on to adding code.
Pyenv & Python version
Install Pyenv
We’ll be using pyenv to manage our Python versions. It’s a convenient tool to choose Python version that a specific project needs. In this scenario let’s target version 3.11.
Let’s follow Pyenv Installation Instructions, and when it’s installed let’s install Python 3.11:
(It will take a while):
❯ pyenv install 3.11

python-build: use openssl@1.1 from homebrew
python-build: use readline from homebrew
Downloading Python-3.11.6.tar.xz...
-> https://www.python.org/ftp/python/3.11.6/Python-3.11.6.tar.xz
Installing Python-3.11.6...
... omitted for brevity ...
Activate Python 3.11
We’ll set the local version (system version won’t be affected)
❯ pyenv local 3.11It will create a .python-version file, make sure to keep it in the git repo.
Let’s confirm the current Python version, it should start with 3.11.
It may be a different patch version (different from 6.
❯ python --version
Python 3.11.6
Direnv (Optional)
It’s recommended to use direnv with Pyenv to automatically set the Python version when entering the directory. There is an excellent DigitalOcean guide on How To Manage Python with Pyenv and Direnv.
Poetry
Init Poetry project
We’ll be using poetry for our package and virtual environment management. It’s a standard way for Python and highly recommended.
We will install packages later, so please skip the interactive dependencies.
Basically the whole process is to hit <RETURN> till the end.
❯ poetry init

This command will guide you through creating your pyproject.toml config.

Package name [crabcoin-web]: <RETURN>
Version [0.1.0]: <RETURN>
Description []: <RETURN>
Author [AutomationD <d@automationd.com>, n to skip]: <RETURN>
License []: <RETURN>
Compatible Python versions [^3.9]:  <RETURN>
Would you like to define your main dependencies interactively? (yes/no) [no] <RETURN>
Would you like to define your development dependencies interactively? (yes/no) [no] <RETURN>
Do you confirm generation? (yes/no) [yes] <RETURN>
Set Poetry Python version
This way we’ll tell poetry to use a specific Python version in the the virtualenv.
❯ poetry env use 3.11

Using virtualenv: /Users/AutomationD/crabcoin/crabcoin-web/.venv
Install Python dependencies
Packages will be installed into a virtualenv and available for our use.
❯ poetry add fastapi "uvicorn[standard]"

... Omitted for brevity ...
Package operations: 18 installs, 0 updates, 0 removals
... Omitted for brevity ...
FastAPI
It’s time to create our first application. We’ll be using a very simple example from FastAPI First Steps.
Create app/main.py like this:
from fastapi import FastAPI

app = FastAPI()


@app.get("/")
async def root():
    return {"message": "Hello World"}


@app.get("/up")
async def up():
    return {"status": "OK"}
To see if it works run:
❯ poetry run uvicorn app.main:app --host 0.0.0.0 --port 3000Now browse to http://127.0.0.1:3000/.
There should be a message in the browser {"message":"Hello World"}
.gitignore
Create .gitignore with the following contents:
__pycache__/Commit Changes
Let’s commit our changes to git.
❯ git commit -am "Initial"
[main (root-commit) 9f3f30d] Initial
 1 file changed, 8 insertions(+)
 create mode 100644 app/main.py
This code will remain local for now (But we’ll push it later to GitHub). Our Dev part is done here.
Let’s move on to Ops!
Ops
Kamal installation: gem vs Docker
Kamal is written in Ruby, so there are two ways to run Kamal, I prefer to run it natively so there is no Docker overhead. Feel free to skip RVM, Ruby and Kamal installation if Docker approach is more acceptable, as described here.
Install RVM and Ruby
RVM is a Ruby Version Manager: the best way to install and manage Ruby. Follow Docs on how to install it.
Latest stable Ruby version was 3.2.0, so we are going to install it
❯ rvm install 3.2.0
❯ rvm 3.2.0
Install Kamal gem
❯ gem install kamal
❯ kamal version

1.0.0
More info on Kamal installation
Docker Registry
We’ll be using Github Packages to store our Docker images. It’s an easy way to get started. Free account allows us to store up to 500MB. It’s not a lot, but it’s a good start. Pricing for other plans is available here.
Setting up a container registry on Github is rather simple, the steps are the following:
- Get PAT Token Classic (Personal Access Token) (ideally scoped just to packages)
- Export token to your environment via
export CR_PAT=<YOUR_TOKEN>, but better use direnv - Login with a Docker client to the Github Package registry via
echo $CR_PAT | docker login ghcr.io -u USERNAME --password-stdin
Now we are ready to do docker push to github container
Github Container Registry has great documentation on that topic.
Hetzner
We’ll be using Hetzner Cloud to host our servers.
Go ahead and create a new project for our app.
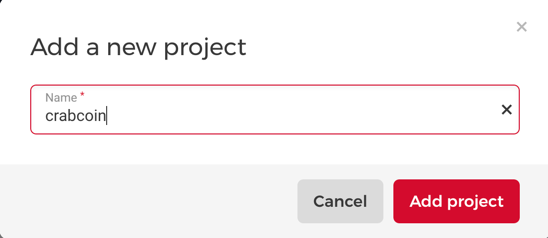
Then click on Add Server
Select Location (We’ll choose Helsinki this time for no reason)
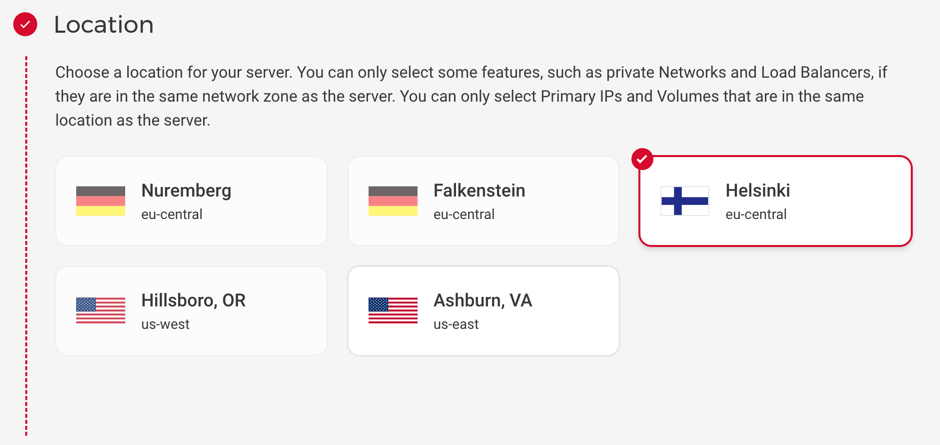
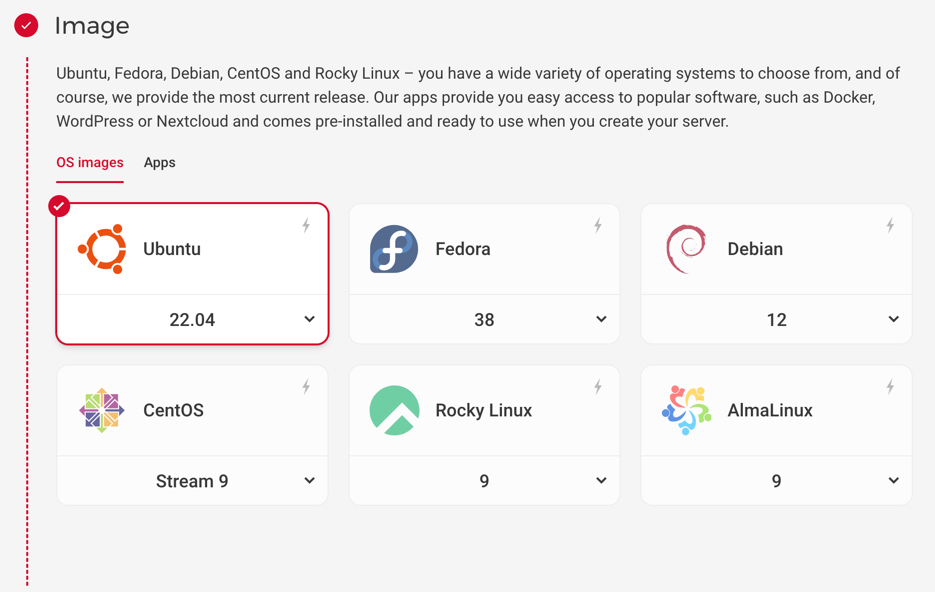
Select Ubuntu 22.04 (or the current LTS). Most likely it will be pre-selected.
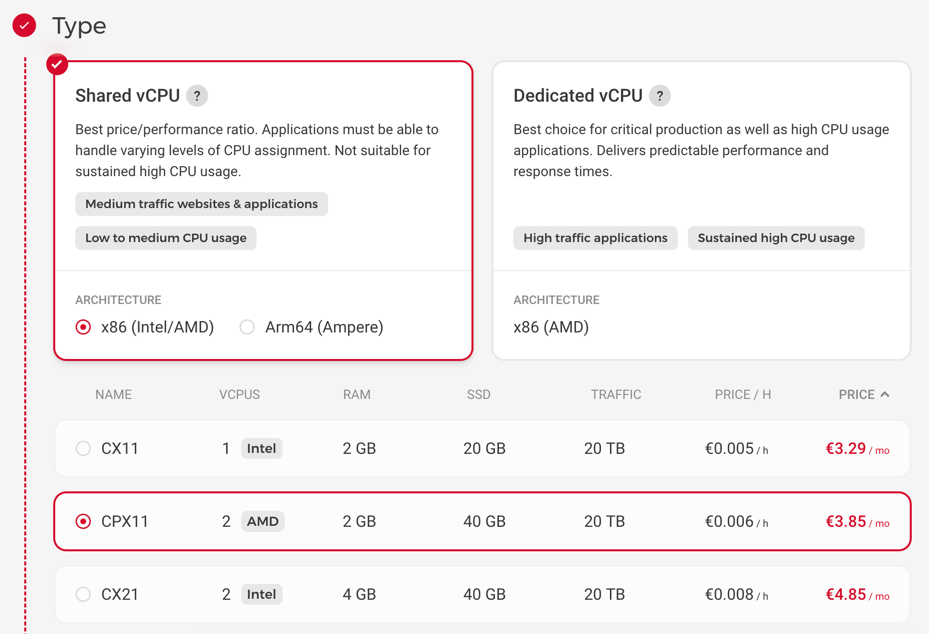
Select Server Type. We’ll choose CPX11 which would give us 40GB of SSD, 2vCPU and 2GB of RAM. Should be plenty for our small application.
Keep Networking as-is
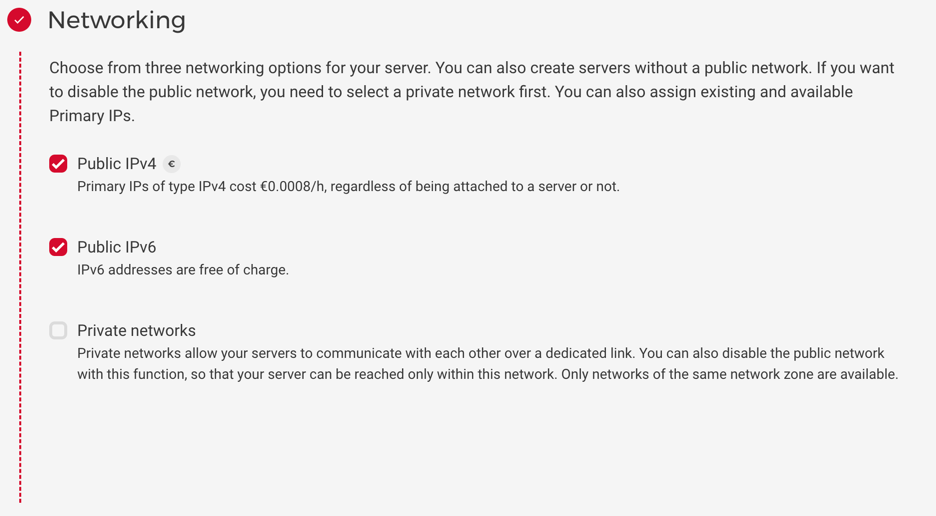
Configure SSH Key. Get a public key for the next step.
On MacOS one can use pbcopy as follows: cat ~/.ssh/id_rsa.pub | pbcopy
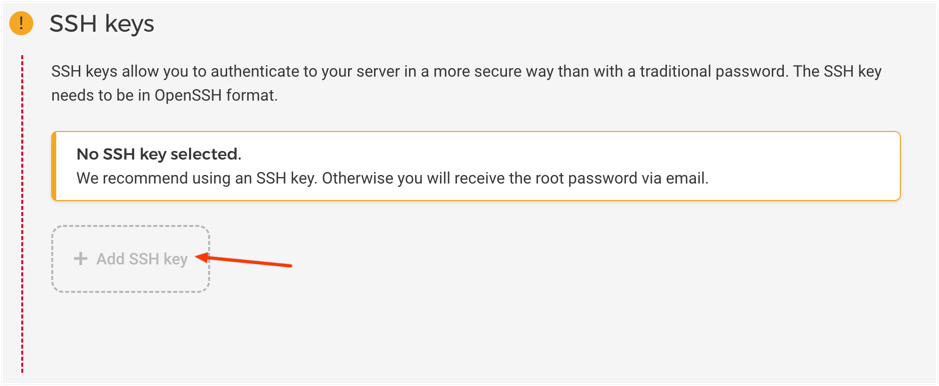
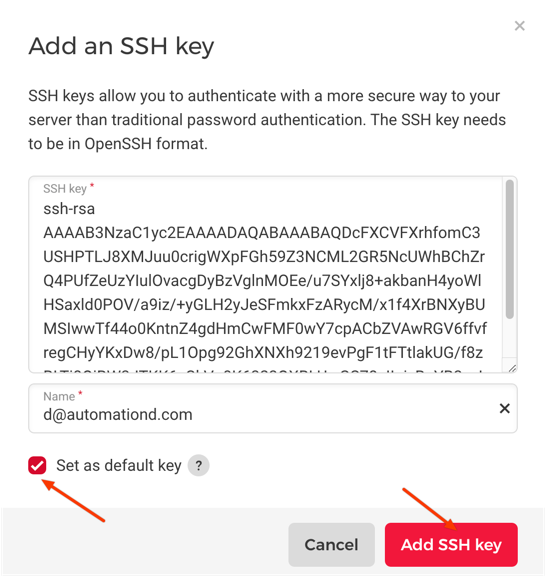
Paste a public key and click Add SSH Key
There are other useful options, but we’ll scroll all the way to the Server Name.
Enter a name for this specific, we’ll use w100.crabcoin.cc, (as in web 100).
This is going to be an “internal” DNS name, meaning it won’t be visible to a customer (we’ll create that one later).

Check final pricing and click “Create & Buy now”
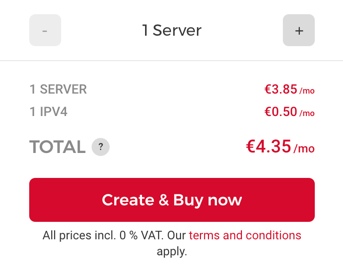
Eventually the page will be redirected to the server list, find w100.crabcoin.cc.
Please note the IP address, we will need it later, in our case it’s 95.217.214.6.

Test Host access
It would be useful to confirm there is ssh access to our new host.
❯ ssh root@95.217.214.6

The authenticity of host '95.217.214.6 (95.217.214.6)' can't be established.
ED25519 key fingerprint is SHA256:abcdefghklmnopqrstf2ca1bb6c7e907d06dafe4687e579f2.
This key is not known by any other names.
Are you sure you want to continue connecting (yes/no/[fingerprint])?

-> yes


root@w100:~#
If there is a prompt it means it’s possible to connect. Moving on to the next step!
Configure DNS - Cloudflare
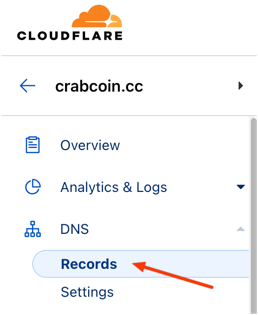
crabcoin.cc. If not, please read on How to Add a Domain From Namecheap to Cloudflare.In order to configure DNS records for crabcoin.cc please select the domain in a Cloudflare account and then go to DNS -> Records.
th
Configure Technical Domain
This configuration is for our internal needs to connect to a host via a domain and not IP address. This domain won’t be seen by a customer The goal is to
- Create an A record to point
w100.crabcoin.cc --A--> 95.217.214.6(IP from ssh test) - Don’t enable Cloudflare Proxy
Click on Add record

Enter record data:
- Name:
w100 - IP:
95.217.214.6 - Proxy Status: Disabled
 Disabled Proxy Warning
Disabling Cloudflare Proxy is not entirely secure for production as it exposes host’s IP address, but it’s sufficient for the purpose of this Scenario.
Safe to ignore for now, but for more information on SSH + CloudFlare Proxy please refer to Connect with SSH through Cloudflare Tunnel
Test this by running:
❯ nslookup w100.crabcoin.cc

❯ nslookup w100.crabcoin.cc
Server:		1.1.1.1
Address:	1.1.1.1#53

Non-authoritative answer:
Name:	w100.crabcoin.cc
Address: 95.217.214.6
If the nslookup command returns correct IP it means that a DNS record is working.
If it doesn’t return correct result, ensure that:
- NS Servers are configured correctly (How to Add a Domain From Namecheap to Cloudflare._)
- A bit of time has passed, since DNS propagation is much slower than changes on other layers.
At this stage it’s possible to ssh into the host via it’s domain name:
❯ ssh root@w100.crabcoin.ccConfigure Public App Domain
This configuration is for a public app. This domain will be seen by a customer. The goal is to:
- Create an A record to point
app.crabcoin.cc --A--> 95.217.214.6(IP from ssh test) - Enable Cloudflare Proxy
Click on Add record

Enter record data:
- Name:
app - IP:
95.217.214.6 - Proxy Status: Enabled

Init Kamal Project
kamal initCreate Dockerfile
FROM python:3.11.6

ARG ENV='dev'
ARG POETRY_VERSION="1.3.1"
ARG USER_FOLDER="nonexistent"
ARG PORT="3000"

WORKDIR /app

# Order is designed to cache packages if the lock file hasn't changed.
COPY ./poetry.lock ./pyproject.toml /app/
COPY ./ /app/

RUN pip install "poetry==$POETRY_VERSION"

RUN \
  poetry config virtualenvs.create false && \
  poetry install --no-interaction --no-ansi $(test "$ENV" = 'prod' && echo "--no-dev")

EXPOSE $PORT

CMD ["uvicorn", "app.main:app", "--host", "0.0.0.0", "--port", "3000"]
Configure Kamal Project
Edit config/deploy.yml
service: crabcoin-web
image: automationd/crabcoin-web
servers:
  - w100.crabcoin.cc

registry:
  server: ghcr.io
  username: USERNAME
  password:
    - CR_PAT

traefik:
  options:
    publish:
      - 443:443
  args:
    entryPoints.web.address: ":80"
    entryPoints.web.http.redirections.entryPoint.to: websecure
    entryPoints.web.http.redirections.entryPoint.scheme: https
    entryPoints.web.http.redirections.entrypoint.permanent: true

    entryPoints.websecure.address: ":443"
    entryPoints.websecure.forwardedHeaders.trustedIPs: "127.0.0.1/32,10.42.0.0/16,173.245.48.0/20,103.21.244.0/22,103.22.200.0/22,103.31.4.0/22,141.101.64.0/18,108.162.192.0/18,190.93.240.0/20,188.114.96.0/20,197.234.240.0/22,198.41.128.0/17,162.158.0.0/15,104.16.0.0/13,104.24.0.0/14,172.64.0.0/13,131.0.72.0/22" # CloudFlare IPs per https://www.cloudflare.com/ips-v4/#
    entrypoints.websecure.http.tls: true
    entrypoints.websecure.http.tls.domains[0].main: "app.crabcoin.cc"
    accesslog: true
accesslog.format: json❯ kamal setupCreate GitHub Repo
Head to Create New Repo and create a new crabcoin-web repo.
We will use it later to push our local code.
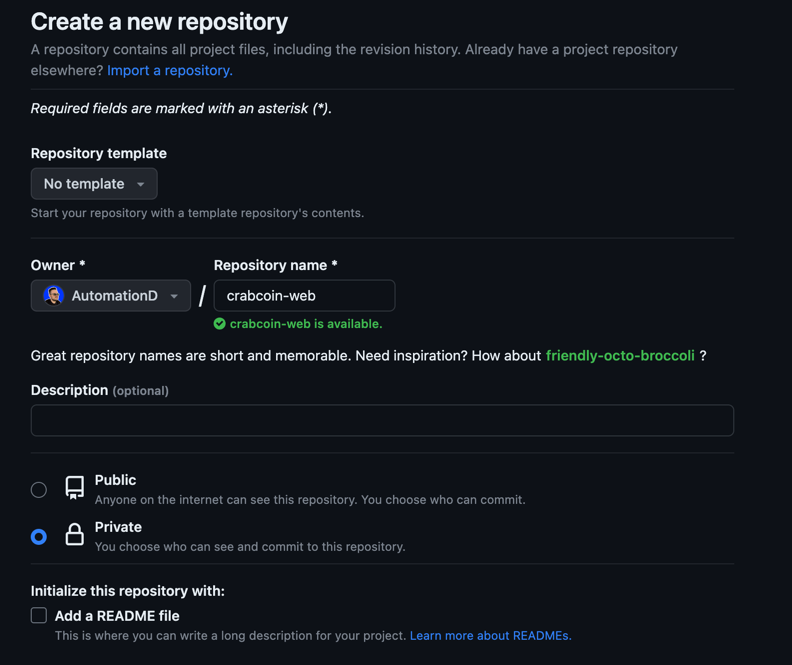 Click on Create repository

Copy git url, we’ll use it later.
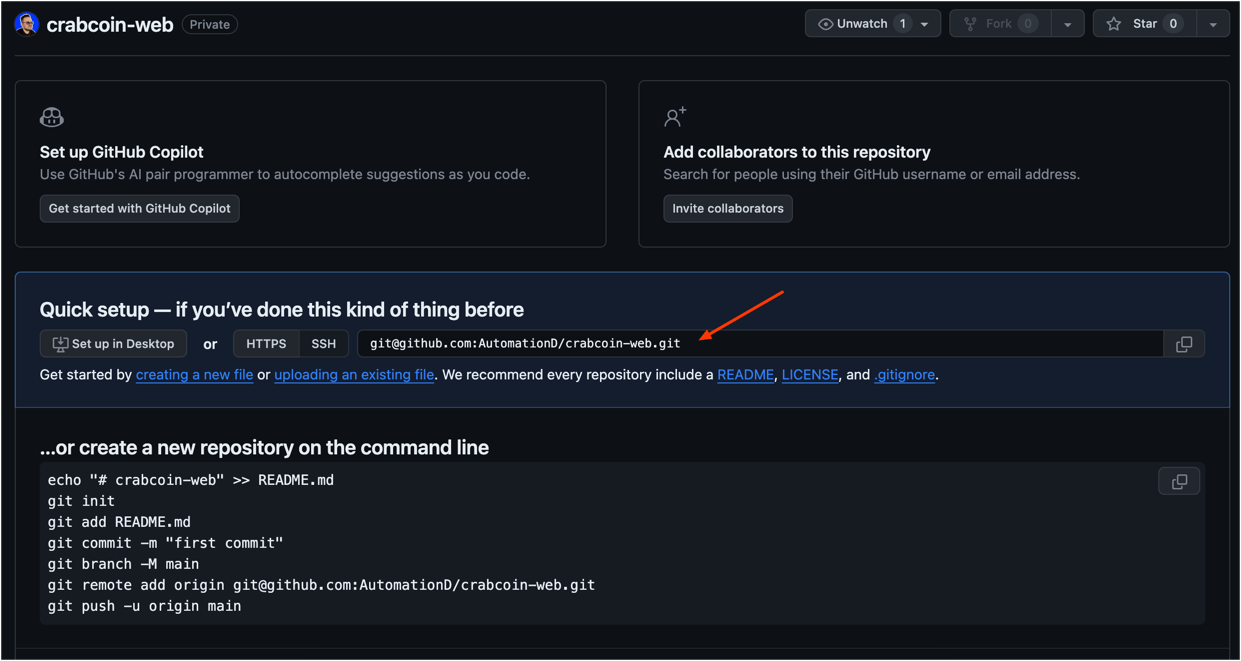 In this scenario it would be:
 git@github.com:AutomationD/crabcoin-web.git
Configure Github Actions
Create .github/workflows/prod.deploy.yml
name: "[prod] Crabсoin Deploy"
defaults:
  run:
    shell: bash

on:
  push:
    branches:
      - main
  workflow_dispatch:

jobs:
  web:
    runs-on: ubuntu-latest
    steps:
      - name: Checkout Code
        uses: actions/checkout@v2
        with:
          submodules: true

      # Needed for Kamal
      - uses: ruby/setup-ruby@v1
        with:
          bundler-cache: true

      - name: Install Kamal
        run: gem install kamal

      - name: Install SSH key
        uses: shimataro/ssh-key-action@v2
        with:
          key: ${{ secrets.SSH_PRIVATE_KEY }}
          name: id_rsa
          known_hosts: unnecessary
          if_key_exists: replace

      - name: Deploy
        run: kamal deploy
        env:
          GITHUB_TOKEN: ${{secrets.GITHUB_TOKEN}}
Configure Github Actions Permissions
Got to Settings of the repo, then to Actions / General

Then scroll down to Workflow Permissions and allow the following setting:

Also, make sure to Associate Package with Repo
Push code to Github
git remote add origin git@github.com:AutomationD/crabcoin-web.git
git commit -am "Initial Commit"
git push --set-upstream origin main
Navigate to Actions section of the repo

Watch the CI/CD pipeline. If deployment is successful it would be green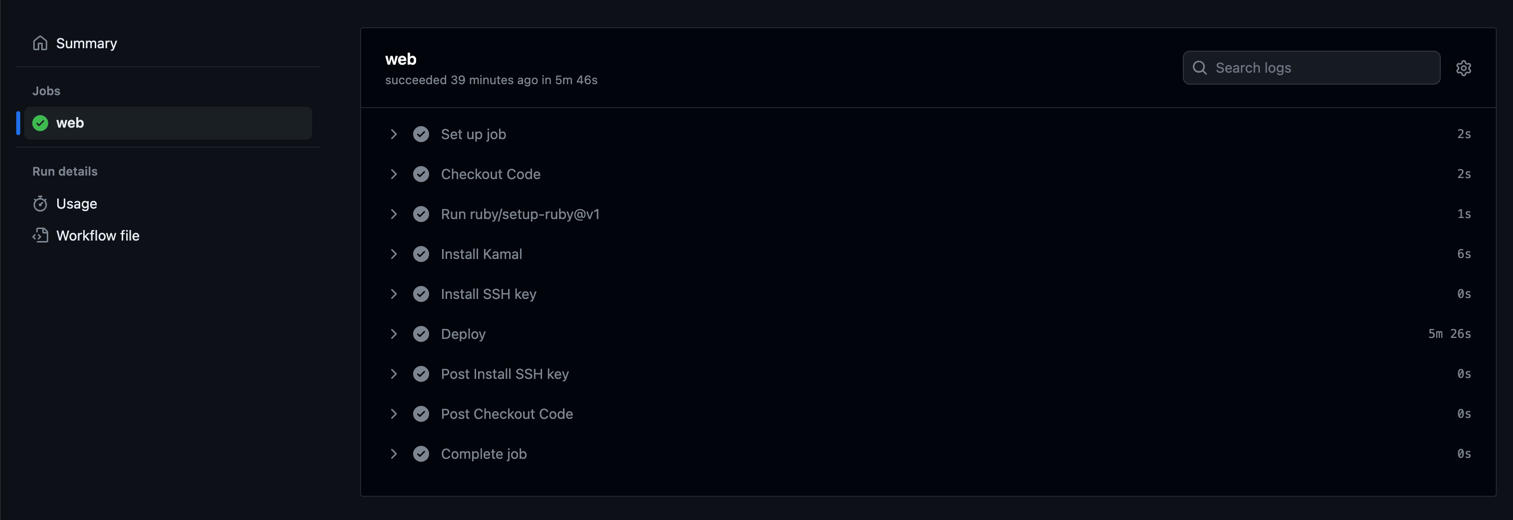
IDE Schema Config (optional)
For auto-completion on Kamal syntax in the yaml file it’s possible to configure Schema.
VScode
Use schema.yaml
For VSCode Add this to a config/deploy.yml file
# yaml-language-server: $schema=https://raw.githubusercontent.com/kjellberg/mrsk/validate-with-json-schema/lib/mrsk/configuration/schema.yamlJetBrains IntelliJ / PyCharm
Please refer to the official doc and use the schema.yaml and configure Schema Mapping in JSON Schema Mappings for config/deploy.yml file.
Upcoming Improvements
Current application will be improved, and the following upgrades are planned:
- Load Balancing
- Database
- Celery with Workers
Subscribe in order not to miss them!
Inspired by:
Post photo used by @wolfgang_hasselmann
Be the first person to leave a comment!